$250 off
A full head of extensions
*First time customers only
Minimum 120 pieces
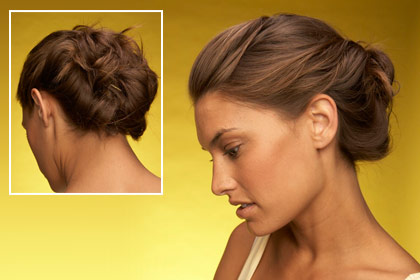
 The Pin Curl Twist
This hairstyle works best on medium to long hair and you’ll need hair that is a bit dirty, so about day two after you last shampooed would work best!
plenty of bobby pins
hairspray
Grab your fringe section and brush it out, about 2-inches wide. Secure it to the back of your head with a couple of bobby pins (criss cross style). Loose the front with your fingers if you want something a bit softer.
You should have sections of hair over each ear and at the back. Using your index finger, run it from your left ear up to the crown of your head, grabbing the hair as you go. Place this into a low ponytail below your left ear. Make sure it’s smooth. Twist the ponytail twice and towards the back of your head. Pin in place with bobby pins and then repeat the same process on your right side. You want to connect the two twists in the middle with more bobby pins.
Where you’ve placed all the bobby pins (hopefully in the middle of your head!), hold it in place with you left index finger and middle finger and then roll a messy section of hair (about an inch) up and around your fingers and create a coil. Pinch it in place, slip your fingers out and hold in place with a bobby pin or two. Don’t pin to the twists or they’ll come out. Repeat with the rest of your hair until it’s all up.
Finish the hair with some hairspray and adjust as needed!
Photo Credit: TotalBeauty
With more than 90 colours, blends and shades to choose from, we guarantee your new look will match to your hair perfectly.
Read More
Whether it’s volume or length you’re after, our hair extension specialists can recommend the perfect solution for your makeover.
See Our Work
We offer more than just hair extensions. From cutting and colouring to styling, bridal and barbering.
See What We Do
$250 off
A full head of extensions
*First time customers only
Minimum 120 pieces
 This is a follow on from Bobby Pinning 101 – make sure you have got this covered first before following these tips!
To create a BASE, you need a couple of bobby pins to create an area where the hair is all in place.
You do that by adding another pin and intersecting at the end instead of the middle, so it’s creating a trail of hair that are in place. You can cover this trail with a braid or twists and do a criss cross to hold the braid/twists to the base you created.
Get a bobby pin and position it in a 45 degree angle in the hair and push through the hair (not on top of the hair).
If you don’t want to show bumps on your hair, just position the bobby pins where the smooth part is on the one top and the ridged side is the one facing the scalp. You can hide the bobby pins this way in any hairstyle you choose to do.
Tie your hair back in a ponytail. Take a section of your hair and wrap around your fingers like a roll and you’ll create a loop. Criss cross your bobby pins on the inner part of the loop that touches the scalp. Keep on criss crossing until the hair is all in place. Repeat – this is a great way to create some cute, soft curls and if you add some texture spray first, the curls will stay in longer. Leave for 1-2 hours!
If you’re working on a particular hairstyle and there are some loose ends that are not really holding up, you can still fix it with your bobby pins. Run your fingers through the hair and comb it and pin the back end where it meets the hair style with other bobby pins. You can hide it by applying the steps on how to hide your bobby pins above.
When you are pinning for thick hair, you just need more bobby pins and you can apply the idea of sectioning the hair and pinning as you go.
Unlike thin hair wherein you can just pin in certain areas and it will hold up, pinning thick hair may need more support, that’s why we need to pin the hair in sections for more support and a secure hairstyle.
Take the fly away, put it through your bobby pin and push it through the bun or braid and the fly away and the bobby pin is gone!
With more than 90 colours, blends and shades to choose from, we guarantee your new look will match to your hair perfectly.
Read More
Whether it’s volume or length you’re after, our hair extension specialists can recommend the perfect solution for your makeover.
See Our Work
We offer more than just hair extensions. From cutting and colouring to styling, bridal and barbering.
See What We Do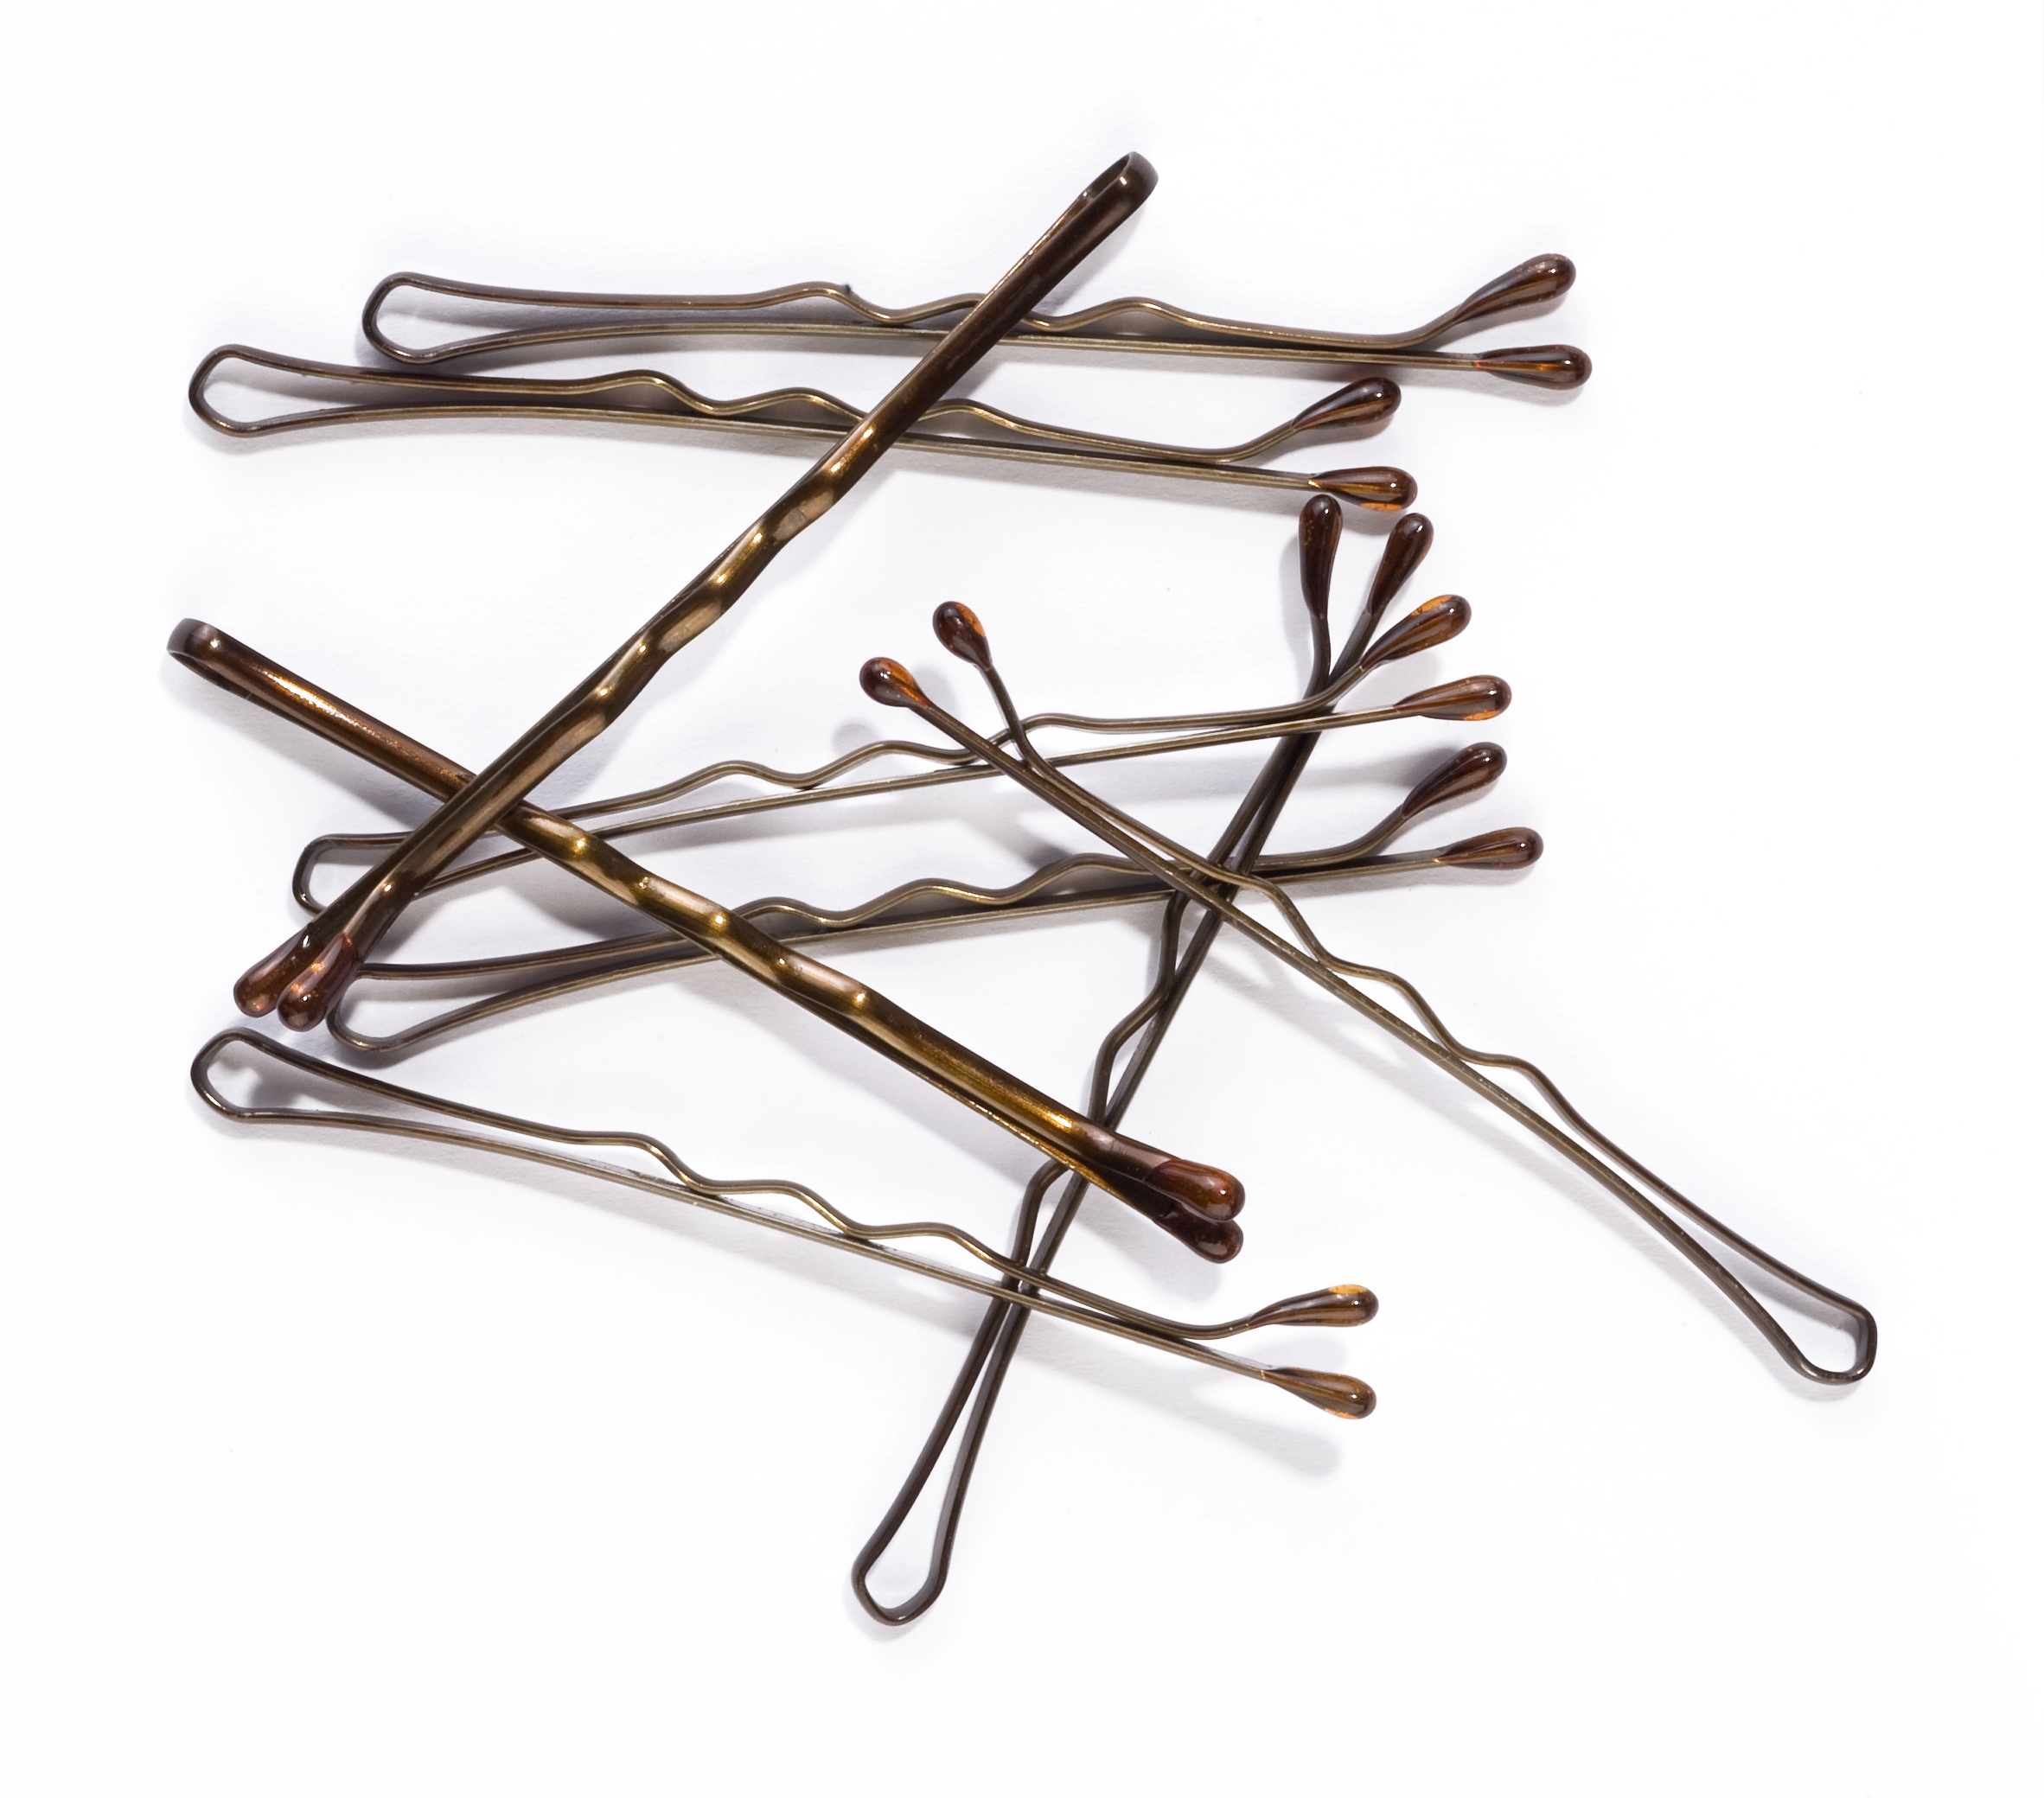
$250 off
A full head of extensions
*First time customers only
Minimum 120 pieces
 #1 Use the Right Bobby Pins
This is a trial and error process, you need to choose what works for you. Some are flimsy and very thin, which may work for thin hair but not for thick hair. So you really need to look for the right one for you.
Is your hair the right texture for bobby pinning? If your hair is silky soft and smooth, the bobby pins may not cling on to your hair.
What you can do though is use dry shampoo or hairspray to make the texture of your hair more coarse for the bobby pin to cling to. If you don’t like product in your hair, another trick is to hold a handful of pins and spray them with dry shampoo. That way the product is on the bobby pin and not directly on your hair.
Teasing your hair is also another trick for a good hold using your bobby pins.
The perfect amount of hair depends on the thickness of your hair. Proper hair sectioning depends on the persons hair type. If it’s too small or too thick, the bobby pins may not be able to do their job.
If you have thick hair, you probably need small sections; that will be perfect for the bobby pins to hold on to. On the other hand, if you have thin hair then you may need medium to large sections of hair that the bobby pins can hold in place.
Interlocking your bobby pins (Criss Crossing) can provide more hold for your hair.
By doing this trick, you can move your hair away from the face and have it pinned at the back.
You can do this by interlocking two bobby pins and creating an “X” – use two bobby pins and clip it in the same area but on opposite ends, interlocking in the middle and creating an “X”. One goes in one way, the other comes in from the other side, upside down.
When you don’t want anyone to see the pins criss crossing over another, you can do that by hiding it under a braid or twists.
Instead of pushing it over the hair, you push the bobby pins under the hair. Criss cross, creating an “X” and it will hold the braid or twists but you can’t see the bobby pins.
Two bobby pins will not work if you’re doing a hairstyle that will use a lot of hair. If you’re doing an up-do or a bun, you’ll need more criss crossing sections that will hold the bun in place.
You may do it where the pins are visible, but for a more clean look – you may choose to hide the criss crossed bobby pins. If you feel that the areas where the bobby pins are still loose, you can add more pins to intersect with your “X” sections to keep a firm hold.
You can see all of this in action by watching this video:
http://www.youtube.com/watch?v=bxSOyUGrNZ8&feature=youtu.be
With more than 90 colours, blends and shades to choose from, we guarantee your new look will match to your hair perfectly.
Read More
Whether it’s volume or length you’re after, our hair extension specialists can recommend the perfect solution for your makeover.
See Our Work
We offer more than just hair extensions. From cutting and colouring to styling, bridal and barbering.
See What We Do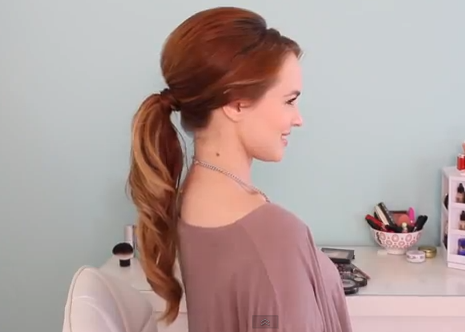
$250 off
A full head of extensions
*First time customers only
Minimum 120 pieces
When it comes to long hair, a ponytail can you be your saviour, particularly when you are having a bad hair day or just can’t think of what to do with your hair.
I’ve always loved a slight retro twist when it comes to ponytails, so here’s a great tutorial on how you can achieve this look.
Simply follow the steps and you’ll have your own retro ponytail in no time!
The video tutorial below shows you how it’s done as well! If you have hair extensions, this is a great hairstyle for your hair.
With more than 90 colours, blends and shades to choose from, we guarantee your new look will match to your hair perfectly.
Read More
Whether it’s volume or length you’re after, our hair extension specialists can recommend the perfect solution for your makeover.
See Our Work
We offer more than just hair extensions. From cutting and colouring to styling, bridal and barbering.
See What We Do
$250 off
A full head of extensions
*First time customers only
Minimum 120 pieces
 Have you considered using hair extensions? Most women feel the need to increase the volume or length of their hair at one time or another.
The good news is that this is possible with hair extensions, meaning that every woman can get that volume or length they so desire.
Hair extensions need to be used the right way so as to ensure they look natural. Here are some tricks and tips that will ensure that you never get it wrong when it comes to hair extensions.
Clip-in hair extensions are not always the best option though – if you are looking for a more permanent solution, contact me today to discuss how utilising Great Lengths bonded hair extensions can make you have full and healthy looking hair in just a matter of hours!
With more than 90 colours, blends and shades to choose from, we guarantee your new look will match to your hair perfectly.
Read More
Whether it’s volume or length you’re after, our hair extension specialists can recommend the perfect solution for your makeover.
See Our Work
We offer more than just hair extensions. From cutting and colouring to styling, bridal and barbering.
See What We Do
$250 off
A full head of extensions
*First time customers only
Minimum 120 pieces

Clip In Hair Extensions are great whenever you want to add instant volume, length and colour to your hair. The secret to getting it right with these types of hair extensions is getting quality extensions that complement your natural hair and placing them in the right way.
We suggest you place these extensions about two inches from the forehead to ensure strong grip and prevent those embarrassing extension falling out moments. These should never be a permanent solution though!
If you are wondering how you can use clip in hair extensions, here are three styles that you can totally rock whenever you want to get a fabulous hairdo without trying too hard or spending lots of moola.
There is no better way to keep hair out of your face and still look chic than with a side braid. Clip In Hair Extensions add volume and length to create the perfect long braid.
Comb your hair and the extensions together and spray it to keep your braid neat all day. This style is suitable for a relaxed yet captivating look that is different from your everyday braid.
This is the style for you if you are going to any dressy party or formal occasion. Clip In Hair Extensions are used to create volume and add enough length to ensure a perfect top bun.
Place the clip in extensions into the hair from upside down to ensure a seamless look when you gather the hair up in a ponytail. Style your bun as desired.
This is the easiest among the three styles and it works perfectly for most women and for many occasions. The beauty of creating loose curls is that you can do this at home with a few styling tools and still achieve a perfect look you can wear every day.
Your hair will blend seamlessly with your clip in extensions as you create loose curls, as long as your choice of extensions looks natural in terms of colour, length and texture.
These are some of the styles you can use with Clip In Hair Extensions. There are many more styles you can achieve with a little creativity and with proper styling tools.
However, clip in hair extensions don’t stay in for long and are not a good option if you plan to go swimming or away on holiday. Bonded hair extensions, such as Great Lengths, are a much better solution! Contact me today to chat about what I can do for you!
With more than 90 colours, blends and shades to choose from, we guarantee your new look will match to your hair perfectly.
Read More
Whether it’s volume or length you’re after, our hair extension specialists can recommend the perfect solution for your makeover.
See Our Work
We offer more than just hair extensions. From cutting and colouring to styling, bridal and barbering.
See What We Do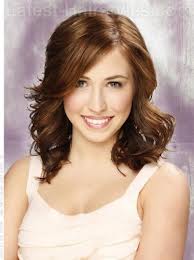
$250 off
A full head of extensions
*First time customers only
Minimum 120 pieces

It’s true that we all want to have beautiful, long and healthy hair. This, however, requires some work and some changes in the way we treat our hair and our bodies in general. There is no better time to do this than at the beginning of the year.
If you are tired of having bad hair and looking forward to a healthy mane all year round, the following changes will ensure that you achieve your goal and look stunning all throughout 2014.
1. Don’t be afraid of change
If you have been postponing changing your hairstyle for ages, this is the time to make that much needed change. As the saying goes, change is as good as a rest and changing your hairstyle will allow you to explore new trends and update your look immediately. Be careful and only choose styles that are suited to your face shape and allow your hair to grow and look healthy during the year.
2. Avoid hair damage at all costs
Most of us suffer from severe hair damage and this is brought about by a number of factors. The number one cause of hair damage is heat, which most of us experience with frequent blow drying and hair straightening.
Reduce the number of times you blow dry your hair or straighten it, and use the right products when you blow dry to ensure that your hair doesn’t become weak. Don’t use too much product on your hair and make sure you choose and read labels before purchasing hair products.
Let your hair have rest days too, free from any hair products and just go au naturel. Trying to avoid hair damage is still the best way to care for your had and it will also save you money from treatments.
As the cliche goes, prevention is better than cure. Remember, your hair is your crowning glory – take care of it!
3. Splurge a little on professional care
Getting your hair professionally styled can be a bit expensive but the results are often amazing and we all need some pampering every now and then. A stylist will fix any split ends you might have (if any) and give your hair the tender loving care it needs. Schedule at least one visit to your hair stylist every few months.
4. Plan ahead for those “bad hair days”
Our hair will misbehave once in a while and this is where a backup plans comes in handy. Whether it’s a stylish hairpiece or an easy, yet elegant hairstyle, have a style that you can always use every time your hair gets a mind of its own and refuses to follow your styling regime!
5. Have a blast with your hair
Aim to change your style more often this year to get the best out of it. By having fun styling, you will discover what works for you and ensures that your mane is healthy and you look stylish all year round. Enjoy it and have fun.
Image Credit: Latest Hairstyles
With more than 90 colours, blends and shades to choose from, we guarantee your new look will match to your hair perfectly.
Read More
Whether it’s volume or length you’re after, our hair extension specialists can recommend the perfect solution for your makeover.
See Our Work
We offer more than just hair extensions. From cutting and colouring to styling, bridal and barbering.
See What We Do